
Recently, I managed a client control panel that was hosted on Vesta Cpanel. Being a newbie to the platform, I had some issues adapting to the system and getting to know my way around it.
I tried checking online for tutorial and didn’t actually find much or even video tutorials to help solve my problems.
The Vesta cp forum was quite helpful though, but I had to do a lot of trial and error to get most of the problem fixed.
The steps below helped me on how to add a subdomain on Vesta cp.
How to add a subdomain on vesta
1. Log into your Vesta CP. under the Web tab, -> Click Add Web Domain.

2. Enter in the subdomain you want to use (sub2.example.com), select the IP address (eg. 135.135.135.135), then add.
3. Log into your DNS. I use Cloudflare for my DNS. Just add the following records under the root domain (example.com).
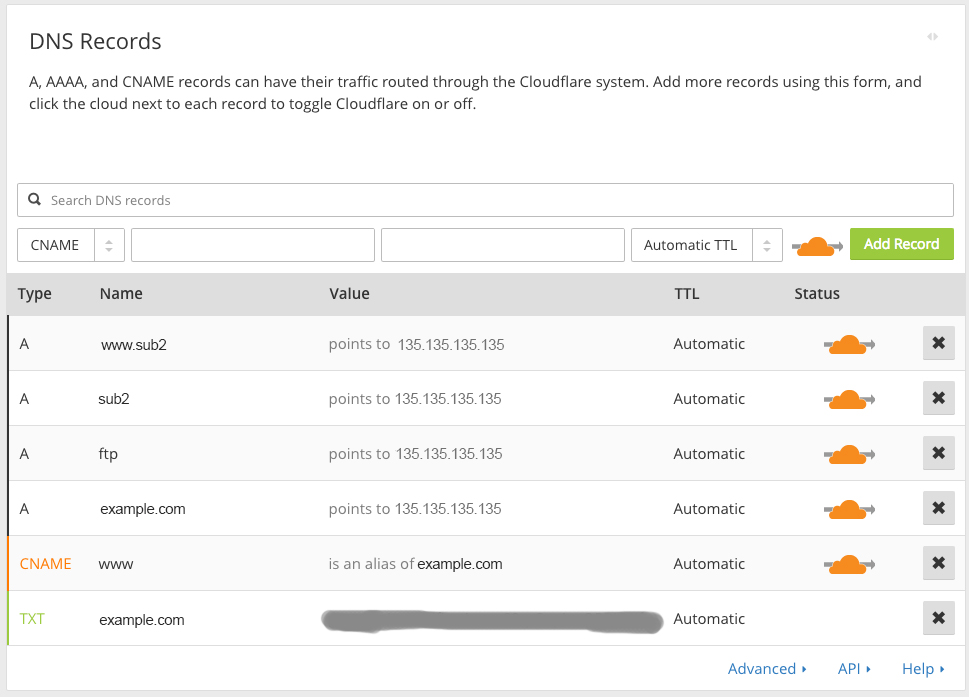
Type Name IP Address
A sub2 135.135.135.135
A www.sub2 135.135.135.135
Thats it.
You can access the files folder via FTP. The location would be in /home/example/web/sub2.example.com
----------
If you liked this article, please subscribe to our YouTube Channel for tech news, reviews and video tutorials. You can also find us on Twitter, Instagram and Facebook.


Great it works
Thank you
Very clear , thank you !
great! thanks alot :)))
Thank you, it worked great.
This the only website I found very very Perfect. I searched and got 1000 of website which told to adding subdomain in vestacp. But Never thought that I need to see dns error. Thank You so much to Author for making this website.
Thanks a lot x 1000.