
In this article, I will walk you through on how to mount a network drive to Plex inside an LXC container in Proxmox. This way, you can access the external hard drive connected to your router inside your Proxmox LXC container running Plex media server.
There are three steps to achieving this setup.
- Setting up SMB share from your router
- Mounting the share in Proxmox
- Access the shared folder in your Plex LXC container
1. Setting up SMB on your router
Depending on the router you use, there are different ways to achieve this. I will be using the ASUS RT-AC66U for demonstration.
Plug your external hard drive with yor media files to the USB port on your router.
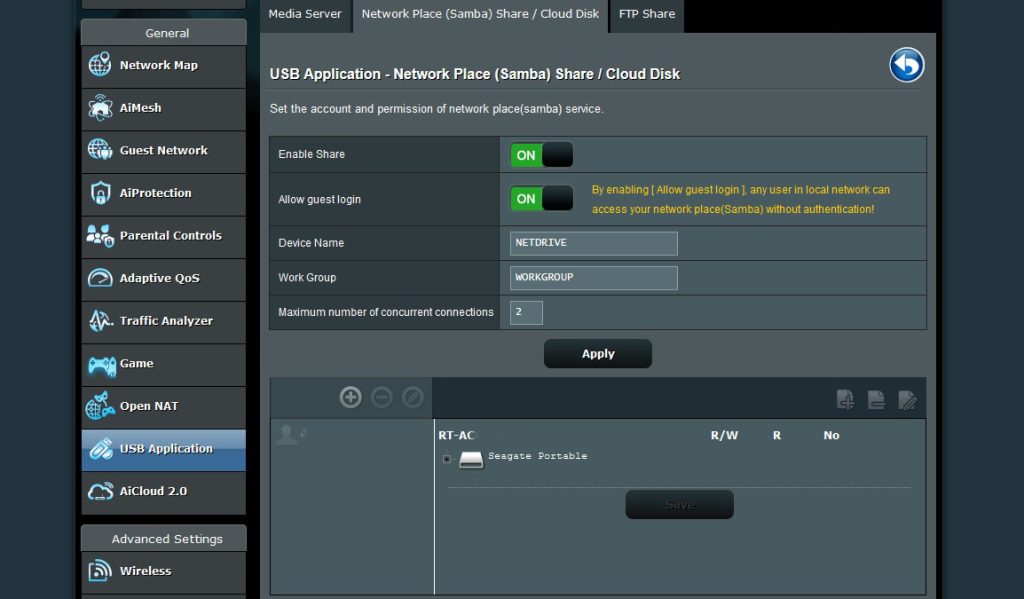
Login to the router interface -> Select USB Application -> Servers Center -> Network Place (Samba) Share / Cloud Disk, Then turn on Enable share and Allow guest login and Apply changes.
On your windows PC, go to network area and get the IP address to the media folder. Eg. \\192.168.0.1\Media\Movies
2. Mounting the share in Proxmox
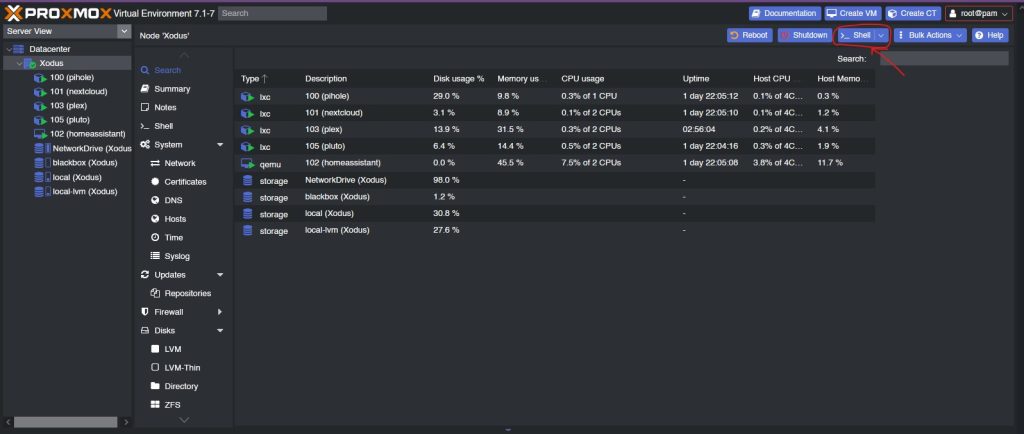
Log into your Proxmox web interface, select your node and start a shell session.
In your shell window, add the following command to install CIFS Utilities packages.
apt install cifs-utils -y
After cifs-utils is installed, enter the next command to create a share folder in the media directory
mkdir /media/share
Next, we need to create a file that’s going to hold credentials for the login of SMB share. To do this we are going to use nano text editor by running the command.
nano ~/.smb
Edit and add the following lines to the file. Update the smb_username and smb_password with the username and password of your SMB share.
username=smb_username
password=smb_password
Press CTRL + X, Y to save and then Enter.
Next, we need to edit a system file called fstab.
nano /etc/fstab
Add the line below to the fstab system files.
\\192.168.0.1\Media\Movies /media/share cifs credentials=/root/.smb,users,rw,vers=1.0,iocharset=utf8
Press CTRL + X, Y to save and then Enter.
For the last step, you need to mount the drive.
mount -a
You have successfully mounted your SMB share to your Proxmox. Next, you need to configured Proxmox to use this share.
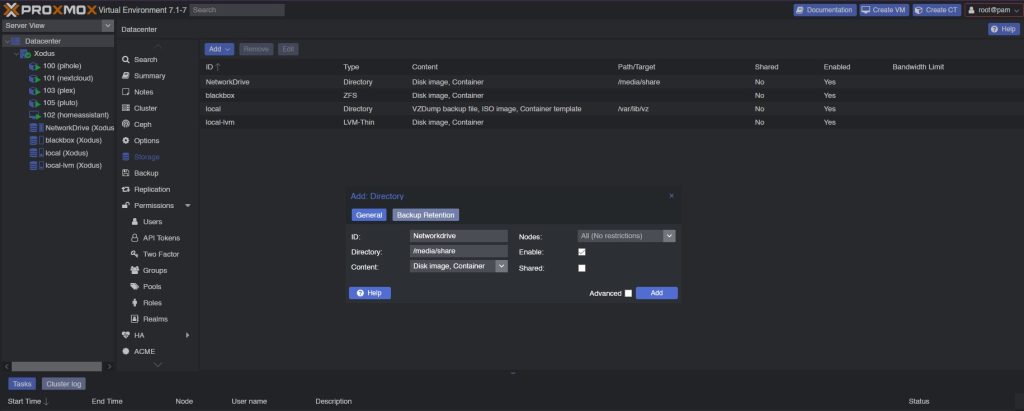
Still in you Proxmox interface, select Datacenter -> Storage -> Add
Fill the ID with your desired name for the storage, then fill out the directory with the mount path that was configured previously. In this case, it’s going to be /media/share.
Select from the content dropdown what you drive should be used for. You can select Disk image and Container or you can select all, then Add.
3. Access the shared folder in your Plex LXC container
If you don’t already have Plex installed in a container, use the Proxmox script in this link to automatically create and install Plex in the LXC container.
After installation, shutdown the Plex container, select your node and start a new shell session.
You want to add the share to the LXC container.
cd /etc/pve/lxc/
ls
You will see the list of all the available containers. You need to edit the Plex container. To open the file, enter the following. (103 is my Plex container)
nano 103.conf
When the file opens, scroll to the bottom and add the code below to mount the share folder.
mp0: /media/share,mp=/mnt/
Press CTRL + X, Y to save and then Enter.
Select the Plex container and start it. You need to check if it has successfully mounted the drive. Select Console and run the following commands.
cd /mnt
ls

If it went well, you should see the folders in your network drive.
Login to you plex via the web interface, add library -> select films -> add folder -> /mnt, you should now see you media folders.
That concludes the process of how to mount a network drive to Plex in an LXC container in Proxmox.
If you have questions, please reach me via the comment section below.
----------
If you liked this article, please subscribe to our YouTube Channel for tech news, reviews and video tutorials. You can also find us on Twitter, Instagram and Facebook.


this did not work. did exactly as the guide states but no share shows up in /mnt
Disregard my last post, the guide says to use version 1.0 of cifs. my NAS isnt allowing that. so had to change to 2.0. And i forgot to give the user permission to use SMB on the NAS (it only had permission to the share)
BUT, for some reason it wont mount automatically after proxmox or the container has restarted.
Thanks, exactly what I was looking for!
Hey thanks, this works great but I have to run ‘mount -a’ each time on boot. It’s not automatically starting my plex LXC or mounting the drive.
Any idea?
I tried adding _netdev to fstab but that didn’t fix it:
\\192.168.1.1\sda1 /media/share cifs credentials=/root/.smb,users,rw,vers=1.0,iocharset=utf8,_netdev
This was awesome – thank you so much! Worked perfectly. The only hiccup – if the host has to reboot for some reason, the drive is not mounted when the system comes back up. Is it necessary to automate the “mount -a” so that this happens automatically?