With each new release of Windows 10, we see more and more useful tools being ported from Linux. First, we had the Windows Subsystem for Linux, which is awesome, and now we have a built-in OpenSSH client and server, which uses version 7.5p1 of OpenSSH.
While the Windows 10 OpenSSH software is currently in Beta, it still works really well. Especially the clientas you no longer need to use a 3rd party SSH client such as Putty when you wish to connect to a SSH server.
For this article, we are going to focus on the OpenSSH Client because Windows does not need another method to gain remote access and configuring a SSH server deserves its own article. Installing the OpenSSH client is easy, but you need to know where to look and it does require a reboot. So make sure its a good time to reboot your computer before following these steps.
First, click on the Windows Start Menu (![]() ) and then in the search field type option. A search result labeled Manage optional features will be displayed, which you should click on. This will open up the Manage optional features screen as shown below.
) and then in the search field type option. A search result labeled Manage optional features will be displayed, which you should click on. This will open up the Manage optional features screen as shown below.
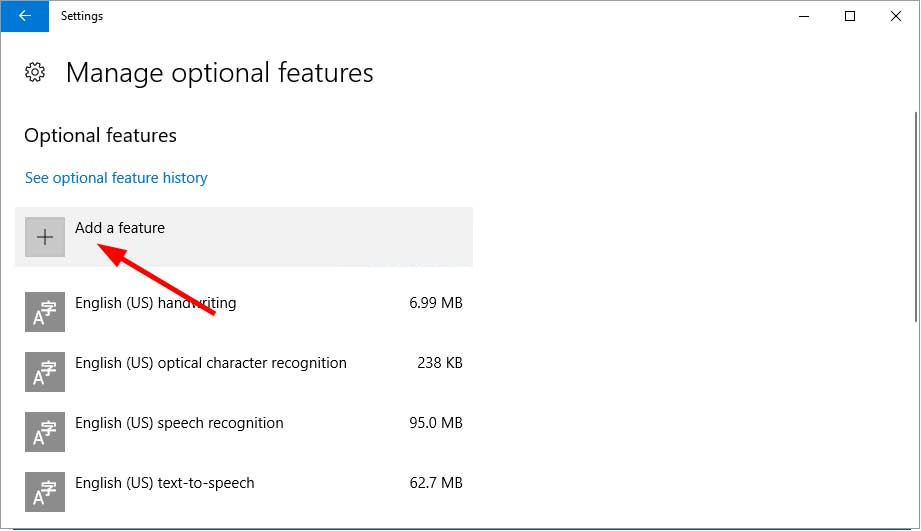
This screen shows all the currently installed optional Windows features. Now click on the Add a feature button as indicated by the red arrow above. This will open up a list of optional features that can be installed. Most of them are font packs, but if you scroll down, you will see the OpenSSH Client (Beta) and OpenSSH Server (Beta).
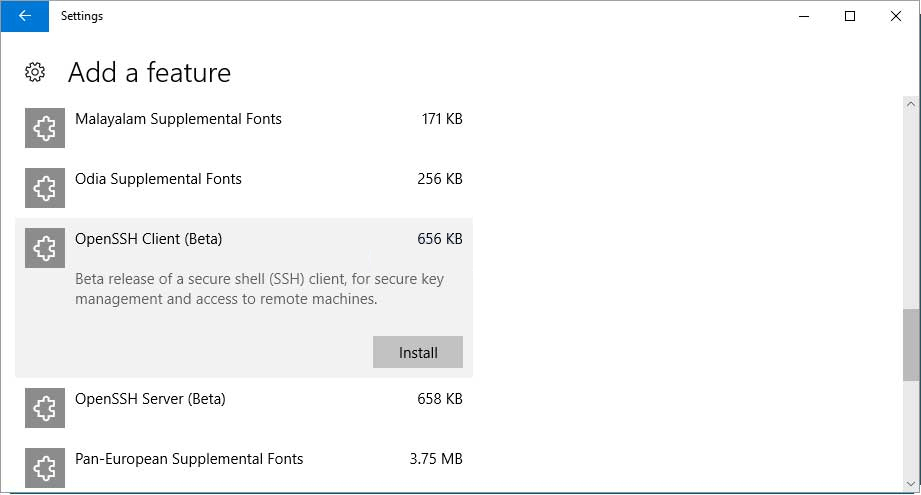
To install the SSH client, or server, simply select it and click on the Install button. Once you click on the Install button, you will see the feature disappear from the list. This is normal and nothing to be worried about. Just click on the back arrow in the upper left of the window and you will be back to the list of installed features.
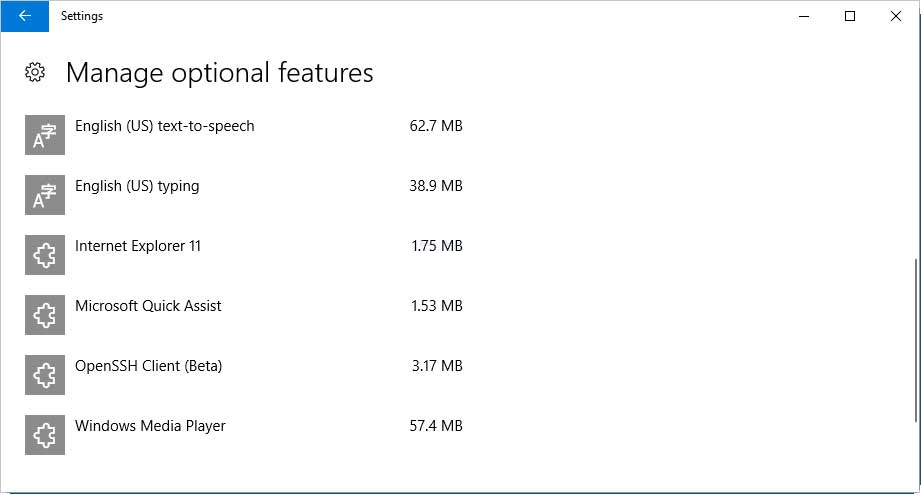
Now, though, you will find that the OpenSSH Client is installed.
You can now close the Manage option features Window and reboot the computer. Rebooting the computer is important in order to finish the installation. Otherwise, Windows wont find the SSH command when you use it in the command prompt.
Now that your computer is rebooted, simply open a command prompt and type ssh and press enter. If the OpenSSH Client was properly installed, you will see the help file that displays all of the command line arguments. For information on what each command line argument means, you can reference this man page for SSH.
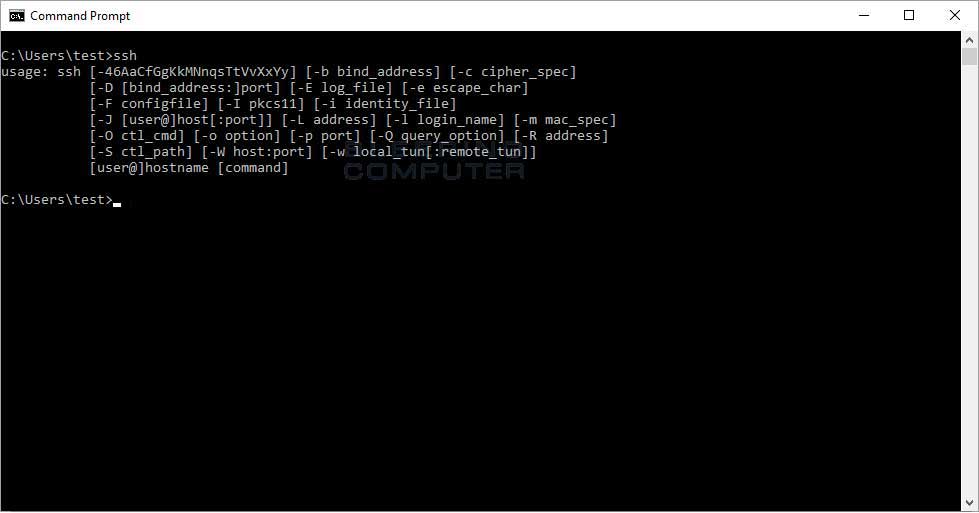
The current list of arguments are:
usage: ssh [-46AaCfGgKkMNnqsTtVvXxYy] [-b bind_address] [-c cipher_spec]
           [-D [bind_address:]port] [-E log_file] [-e escape_char]
           [-F configfile] [-I pkcs11] [-i identity_file]
           [-J [user@]host[:port]] [-L address] [-l login_name] [-m mac_spec]
           [-O ctl_cmd] [-o option] [-p port] [-Q query_option] [-R address]
           [-S ctl_path] [-W host:port] [-w local_tun[:remote_tun]]
           [user@]hostname [command]
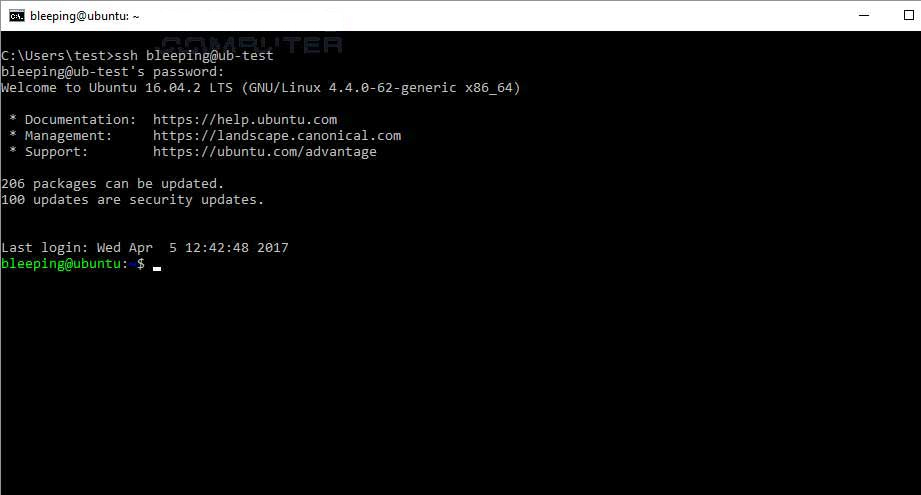
To connect to a remote server you simply use the command line ssh [user]@[host]. For example, to connect to a test Ubuntu server I have setup, I would type ssh bleeping@ub-test. If it’s your first time connecting to a particular SSH server it will display a host key fingerprint and ask you to confirm if you want to connect. If you type yes, this hosts’s key will be saved in the %UserProfile%\.ssh\known_hosts file and you will not be asked again when you connect to the same server.
You will then be prompted to enter the password for the user account on the remote server that you are logging into as shown below.

If you enter the correct password, you will be logged into the remote server and presented with a shell.
When you are done using the remote server and would like to disconnect the SSH session, simply type exit and press enter. You will then be logged out, the SSH client will state “Connection to [server] closed.”, and you can close the command prompt.
----------
If you liked this article, please subscribe to our YouTube Channel for tech news, reviews and video tutorials. You can also find us on Twitter, Instagram and Facebook.