
Google’s Android Device Manager lets users remotely lock a lost or stolen device with a new password or permanently erase the phone
Your smartphone and tablet most likely contain a good amount of data which are sensitive and precious which shouldn’t get into the wrong hands. With the Android Device Manager, you can restrict access into the phone, or permanently erase the content of the phone.
With this app, you can:
- Locate Android devices associated with your Google account
- Reset your device’s screen lock PIN
- Erase all data on the phone
When the Android Device Manager is installed on your phone, and it’s associated with your Gmail account, it can then be used to locate your phone, ring your phone, and reset your phone to factory defaults. It’s easiest to use when you have multiple devices associated with the same Gmail account (so when you lose one device, you use another for locating/ringing/erasing purposes).
or if your account is associated with just one device, you can login from your pc and do the same.
Let’s install this app and demonstrate how it’s used.
[ad name=”Responsive”]
Installation
Note: You only need to install the app on one device, and it will allow you to manage all of your other Android devices. You do, however, have to enable the service on your other devices in order to take advantage of the Lock and Erase features (the Ring feature works regardless).
its always best installing it when you get your new device, so as to make the ring/erase/lock feature when its either lost or stolen.
The installation of Android Device Manager is quite simple. Just follow these steps:
- Open the Google Play Store
- Search for Android Device Manager
- Locate and tap the entry for the app (it will clearly say Google Inc)
- Tap Install
- Tap Accept
- Allow the installation to complete
Once it’s installed, you’ll find the app within the application drawer.
Usage
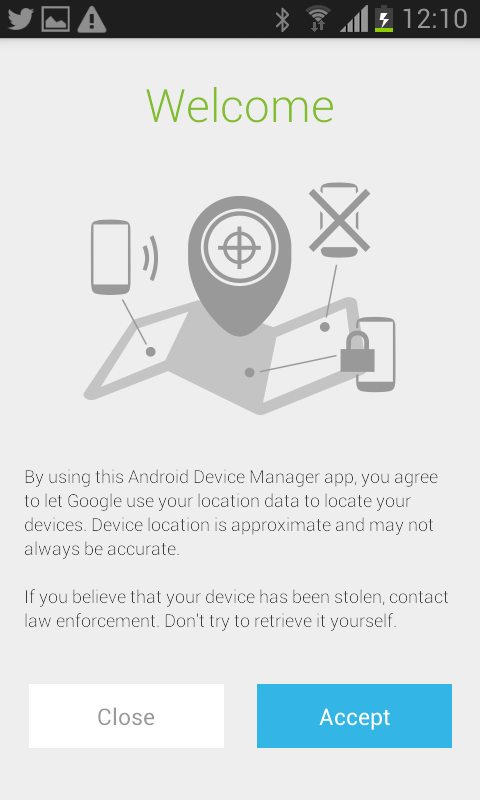
1. When you first fire up Android Device Manager, you’ll be prompted to accept the EULA. Tap Accept.
2. Enter the password associated with your Google account. For security purposes, do not check the box for NEVER ASK ME AGAIN.
Upon successfully authenticating against your Google account, you’ll be presented with the main screen (Below).
From this main screen, you’ll see the location of the device in hand. This isn’t very useful, seeing as how you actually have the device with you. However, if you tap the device drop-down, you’ll see a listing of all devices associated with your Google account. From that list, select the lost device. Once the misplaced device is selected, the location of that device will appear. Drive to that location, and then tap the Ring button. At this point, the lost device will ring for five minutes (or until the ring is silenced). If you find it, congrats! If not, you might want to do the following:
- Tap the Lock button
- Enter (and confirm) a new password for the device Note: When you Select the lock button, you will be prompted to put in a password different from your gmail password; this password will be the password that will lock the phone remotely
- Enter a recovery message (if desired) to be displayed over the phone lock screen
- Tap LOCK
Another incredibly handy feature that comes with the Android Device Manager is the ability to reset a lost device to its factory default (thereby deleting all data). The only caveat here is that the target device must already have the feature enabled for this to work (or the app installed). The risk of having the app installed on all devices is that, should the device be stolen, the thief could delete the app and disable your ability to erase and/or lock the phone. So, I highly recommend installing the app on just one device and then enabling the Lock/Erase feature on all of your other Android devices. Here’s how:
- Open the Android Device Manager app, and from the drop-down, select a target device. If the app isn’t installed on that particular device, you’ll see a Setup Lock & Erase button.
- When you tap the Setup Lock & Erase button, you’ll be prompted to send the setup notification to the target device.
- Tap the Send button, and the app will send the necessary information (for lock/erase setup) to the device in question.
- An icon will appear in the notification area (on the target device), so pull down the notification bar, and tap the Device Manager icon.
- In the resulting window, tap Activate to enable the features on the target phone.
If you can’t locate the device, and you’re concerned about data loss, you can use the erase function. To do this, make sure you first select the lost/stolen device from the main drop-down, and then tap Erase. You’ll be prompted to confirm the process (one that will delete apps, media, settings, and user data). Again, tap Erase, and the process of a factory reset will begin. If the device in question is not currently on, the erase process will begin the next time it’s powered up.
If you have multiple Android devices that hold sensitive data, you certainly should install this free app that will help you locate lost (or stolen) devices and ensure that your data doesn’t fall into the wrong hands.
[ad name=”Responsive”]
To Ring/Lock/Erase from your PC
1. Go to Google Device Manager , login.
After a successful login, you will get a display like this (Below)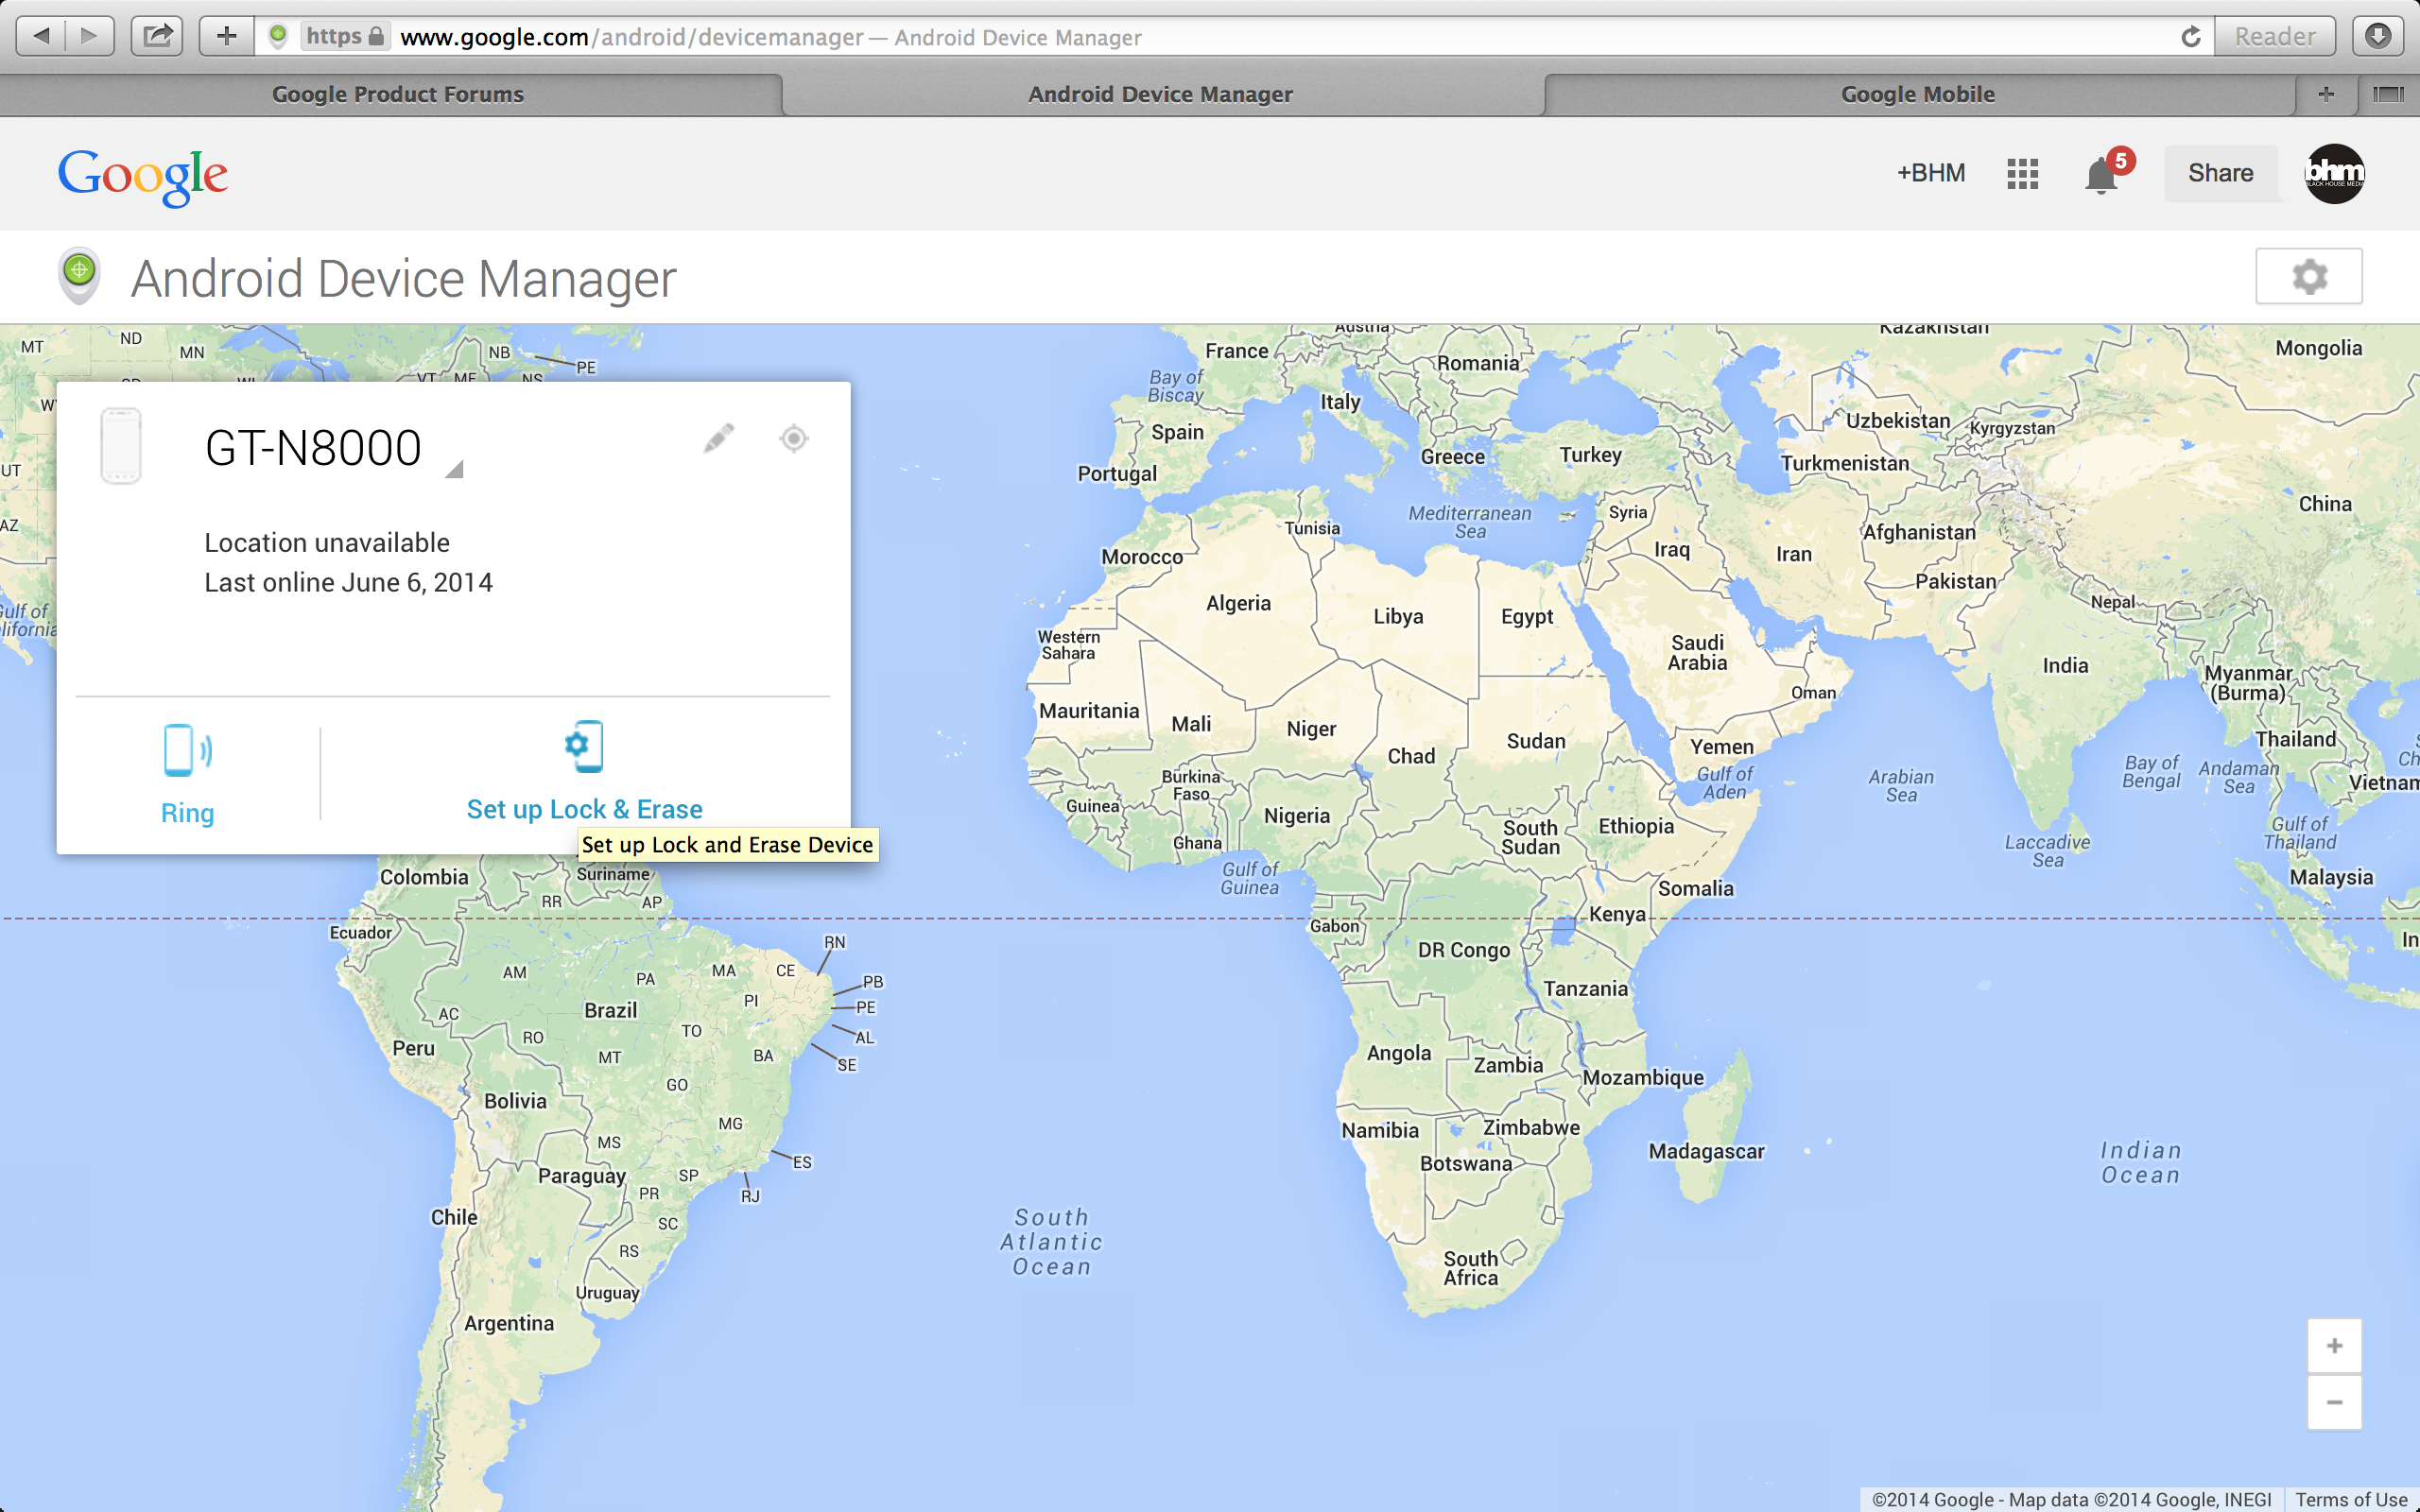
From the screen above, you can either ring, lock or erase the lost/stolen device. But if you have a multiple device associated to the mail, you will need to select the desired device from the dropdown near your current device.
See Android Device Manager on PC below.
----------
If you liked this article, please subscribe to our YouTube Channel for tech news, reviews and video tutorials. You can also find us on Twitter, Instagram and Facebook.


Nice one…thanks for sharing
Cool…went through the process and i got it…really helped ..Thumbs up!
just lost my infinix phone x-507 hot kindly help me on how to trace it.
Hello Stephen, did you have android device manager installed in your phone?
i just lost my infinix hot not. it came with an inbuilt feature where commands could be sent to the phone. i backed up the commands to my friends phone thru sms. but im not entirely sure how it works. i sent d command 2 my number, but wot if my sim card has been removed. please help!!!!
Go to android.com/device manager and check if your device is listed there..